Cisco ASA

Few words about capturing packets on Cisco ASA
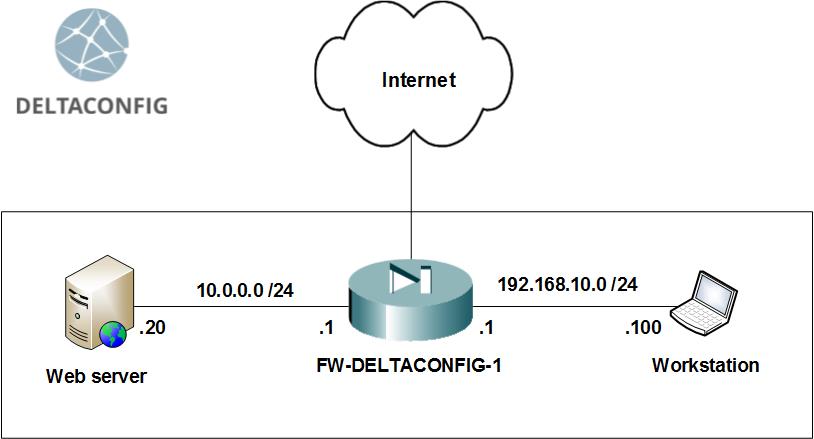
Cisco ASA firewalls have a useful tool for capturing and analyzing the traffic that crosses the firewall, called capture. Sometimes this is also referred to as 'traffic dump' or 'traffic sniffer'.
You only need to set two parameters to start capturing:

indicate the traffic to capture indicate an interface on which you want to apply the capture Step 1. Setting up target traffic

Target packets should be defined with a simple access list. For example, we are interested in capturing traffic from host 192.168.10.100. Create an access list with the following two lines, where the host address serves both as a source and a destination.

You may change 'any' in the lines above to a more specific host address or even a network, or change 'ip' to a specific protocol. For instance, to capture TCP traffic between hosts 192.168.10.100 and 1.1.1.1, use commands like these

Attention!
There are no limitations to that access list: it does not filter any traffic, and you may add as many lines as you need. However, the more diverse packets you capture, the harder it is to analyze the results. In the field, you often capture IP traffic (which includes all connections) between two specific hosts.

Read more →
Tips and Tricks

Connecting to Cisco devices

In order to start working with Cisco equipment, you first need to configure it by connecting to its CLI through the console. Let us take a look at a situation in which you have an administrator workstation and console or rollover cables available somewhere close to the equipment that you want to configure.

1) Configuring Cisco equipment with the use of a console cable

In order to configure Cisco equipment through consoling into its’ CLI, you need to use the blue cable that is shipped with each Cisco device. This cable has to be connected to the COM port of the administrator’s workstation on one end, and the console port of the Cisco device on the other (the interface is marked with “CONSOLE” or “CON” lettering)

Modern PCs and laptops often don’t have the COM port installed. In this case, you will have to purchase a USB to COM (RS232) adapter.
I recommend using the free and simple terminal emulator Putty in order to console into your equipment (Download from the official site). After downloading it, just run the program (it does not require installation) and change the default “SSH” connection type to “Serial” in the dialog box that opens (see the screenshot below). Click “Open” to start your console session.

Read more →